Jetson Nano + Python3 + RealSense の利用 (2020年9月時点)

背景
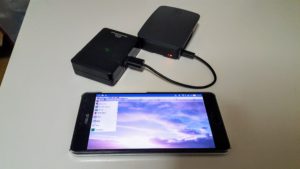
Jetson Nano と RealSense (D415, D435) が手元にあったため使えると省スペースの構成ができて良いかもと考えました。
しかしどうやら準備が簡単ではなさそうなため、素の状態からインストールした手順を記します。
あくまで記述時点(2020年9月時点)の内容であり、すぐ変化しそうなため Qiita でもなく自分のブログに書いておきます。
概要
ほぼ Jetson NanoでRealsenseのPythonラッパーPyRealsenseを使用する方法 で書いていただいている内容を辿らせていただいてますが、要点をまとめると下記です。
- librealsense はソースからビルドする
- 入っている cmake 3.10.2 は cmake 3.12 以上に差替え
- ビルド前に libxinerama-dev, libxcursor-dev, python3-dev の3つは apt-get install
- PYTHONPATH環境変数を指定する
SDイメージの作成
Getting Started With Jetson Nano Developer Kit に従って準備します。
2020/09/15時点の SD Card Image に基づいた手順となります。
その他 Ubuntuの準備
ここは本筋ではないのですが、ビルドより先に行いました。
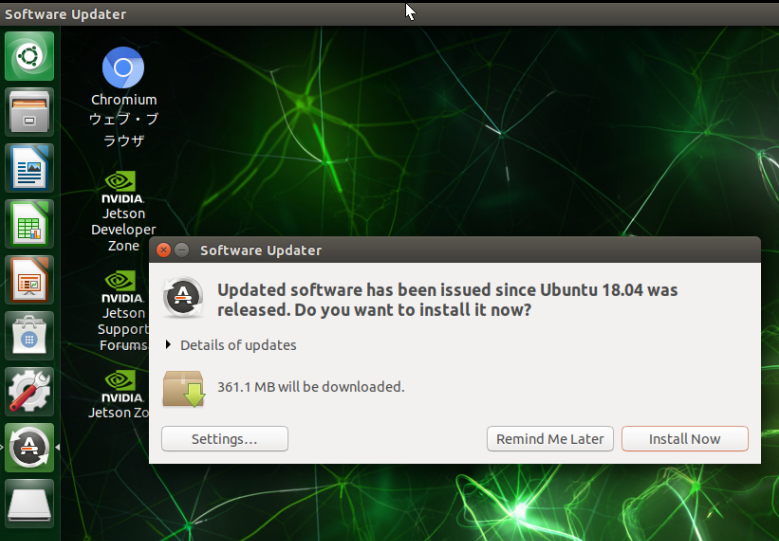
Ubuntuの更新
Ubuntu の自動更新が出ていたのでインストール。
VNCを利用可能に
他PCから操作できると便利なため、VNCで接続できるようにしておきました。
ただしどうも重かったので、SSHで済むところはその方が良かったです。
Jetson Nanoにリモートデスクトップ(VNC)環境を用意する の「方法2」を行いました。
vimで org.gnome.Vino.gschema.xml を開く。(vimの操作に慣れていない場合は別のエディタで開く)
$ sudo vim /usr/share/glib-2.0/schemas/org.gnome.Vino.gschema.xml開いた org.gnome.Vino.gschema.xml の<schema></schema>内に下記keyを追加。
    <key name='enabled' type='b'>
      <summary>Enable remote access to the desktop</summary>
        <description>
          If true, allows remote access to the desktop via the RFB
          protocol. Users on remote machines may then connect to the
          desktop using a VNC viewer.
        </description>
      <default>false</default>
    </key>
保存後、下記コマンドを実行
$ sudo glib-compile-schemas /usr/share/glib-2.0/schemas
$ gsettings set org.gnome.Vino require-encryption false
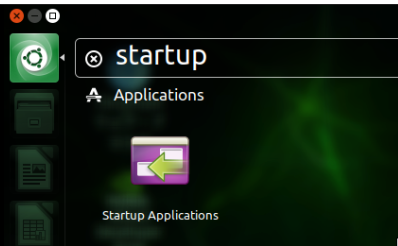
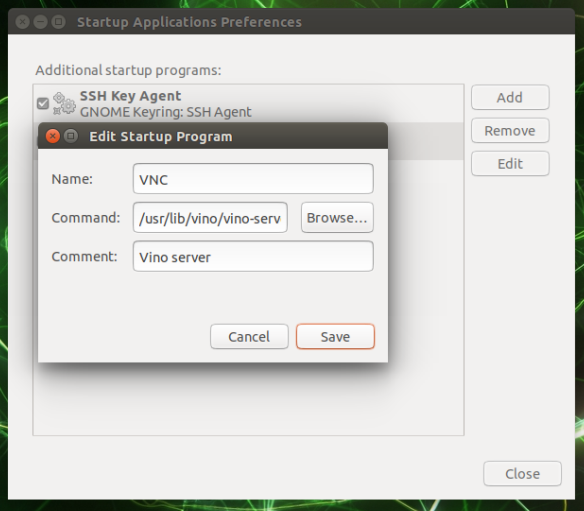
$ gsettings set org.gnome.Vino prompt-enabled falseUbuntu左上のボタンから自動起動の設定を探す。英語だと「Startup Applications」という名前。もし全体が日本語になっていたらそれでは探せないので「自動起動」で検索。
ビルド準備
cmake の差し替え
用意されたイメージではcmake 3.10.2 が入っている状態でしたが、それで librealsense をビルドした場合、Python 2.7 では利用できても Python 3 では利用できませんでした。
そこでこちらのissueを観て、ビルド前に cmake を差し替えました。そこで使われていた 3.13 系では最後の cmake 3.13.5 を入れてみました。
まず cmake をアンインストールします。
$ sudo apt-get remove cmake作業用のディレクトリをお好みで作成します。
私は ext という名前で作りました。
$ mkdir ~/ext
$ cd ~/ext/
cmake のソースをダウンロードしてビルド、インストールします。これは時間がかかります。
curl は入っていなかったため、--no-system-curl を付けておきました。
$ wget https://www.cmake.org/files/v3.13/cmake-3.13.5.tar.gz
$ tar xpvf cmake-3.13.5.tar.gz cmake-3.13.5/
$ cd cmake-3.13.5/
$ ./bootstrap --no-system-curl
$ make -j4
$ sudo make install
以上でインストールされたら、一度ターミナルは抜けてもう一度開くと利用できました。
$ cmake --version
cmake version 3.13.5
依存パッケージのインストール
必ず要るかまでは調査できていませんが、そのまま librealsense をビルドしようとした場合、要求されるものがありました。
CMake Error at third-party/glfw/CMakeLists.txt:235 (message):
  The Xinerama headers were not found
CMake Error at third-party/glfw/CMakeLists.txt:245 (message):
The Xcursor headers were not foundまた、cmake は通っても、make 時点で Python.h が無いと言われ失敗します。
librealsense/wrappers/python/third_party/pybind11/include/pybind11/detail/common.h:111:10: fatal error: Python.h: No such file or directory
 #include <Python.h>
そこで、関連しそうなパッケージをインストールしました。
$ sudo apt-get install libxinerama-dev libxcursor-dev python3-devlibrealsense のビルド
ようやくお目当てのビルドです。
作業用のディレクトリに移動しておきます。
$ cd ~/ext/ソースの取得とビルド、インストールです。
$ git clone https://github.com/IntelRealSense/librealsense.git
$ cd librealsense/
$ mkdir build
$ cd build/
$ cmake ../ -DBUILD_PYTHON_BINDINGS:bool=true
$ make -j4
$ sudo make install
なお cmake 3.13.5 だと Python 2.7 と Python 3.6 の両方を見つけてくれたのですが、ひょっとすると cmake の行は下記の方が良いのかもしれません。
$ cmake ../ -DBUILD_PYTHON_BINDINGS:bool=true -DPYTHON_EXECUTABLE=/usr/bin/python3Udev設定
デバイスを認識させるための設定です。
$ cd ~/ext/librealsense
$ ./scripts/setup_udev_rules.sh
環境変数の設定
以上でインストールはされたことになります。
インストール時のメッセージで、どのディレクトリにPython用の.soファイルが出力されているか見ておきましょう。
-- Installing: /usr/lib/python3/dist-packages/pyrealsense2/pybackend2.cpython-36m-aarch64-linux-gnu.so.2.38.1
-- Installing: /usr/lib/python3/dist-packages/pyrealsense2/pybackend2.cpython-36m-aarch64-linux-gnu.so.2
-- Installing: /usr/lib/python3/dist-packages/pyrealsense2/pybackend2.cpython-36m-aarch64-linux-gnu.so
-- Installing: /usr/lib/python3/dist-packages/pyrealsense2/pyrealsense2.cpython-36m-aarch64-linux-gnu.so.2.38.1
-- Installing: /usr/lib/python3/dist-packages/pyrealsense2/pyrealsense2.cpython-36m-aarch64-linux-gnu.so.2.38
python3/dist-packages/ にインストールされていると、一見もう import pyrealsense2 はできるように見えます。
ですが、 .so ファイルが pyrealsense2 ディレクトリの下にあるため、いざ使おうとすると module 'pyrealsense2 has no attribute 'pipeline' といったエラーとなってしまいます。
$ cd ~/ext/librealsense/wrappers/python/examplses/
$ python3 frame_queue_example.py
module 'pyrealsense2 has no attribute 'pipeline'
そこで環境変数 PYTHONPATH に pyrealsense2 ディレクトリを含めておくようにします。
$ export PYTHONPATH=$PYTHONPATH:/usr/lib/python3/dist-packages/pyrealsense2上記のコマンドをログインするたびに入れるのは面倒なので、ホームディレクトリにある .profile に追加しておきます。
.profile の中身は下記のようにしました。
# ~/.profile: executed by the command interpreter for login shells.
# This file is not read by bash(1), if ~/.bash_profile or ~/.bash_login
# exists.
# see /usr/share/doc/bash/examples/startup-files for examples.
# the files are located in the bash-doc package.

# the default umask is set in /etc/profile; for setting the umask
# for ssh logins, install and configure the libpam-umask package.
#umask 022

# if running bash
if [ -n "$BASH_VERSION" ]; then
    # include .bashrc if it exists
    if [ -f "$HOME/.bashrc" ]; then
        . "$HOME/.bashrc"
    fi
fi

# set PATH so it includes user's private bin if it exists
if [ -d "$HOME/bin" ] ; then
    PATH="$HOME/bin:$PATH"
fi

# set PATH so it includes user's private bin if it exists
if [ -d "$HOME/.local/bin" ] ; then
    PATH="$HOME/.local/bin:$PATH"
fi


# add PYTHONPATH
export PYTHONPATH=$PYTHONPATH:/usr/lib/python3/dist-packages/pyrealsense2
動作テスト
realsense-viewer
インストールが完了すると realsense-viewer が使えるようになっているはずですので、まずはそれでカメラが利用できるか試します。
$ realsense-viewerファームウェアの更新がある場合もそこで通知がでます。
Pythonのサンプル
librealsense のディレクトリ中にサンプルがあるので試してみましょう。
frame_queue_example.py は画像を表示しないためSSHからでも動かせます。
$ cd ~/ext/librealsense/wrappers/python/examples/
$ $ python3 frame_queue_example.py
Slow callback
1
2
3
4
5
(中略)
540
Done
GUI上であれば画像を表示させる下記も動きました。
- align-depth2color.py
- opencv_viewer_example.py
- opencv_pontcloud_viewer.py
参考資料
- Jetson NanoでRealsenseのPythonラッパーPyRealsenseを使用する方法. 2020-01-20.
- pyrealsense2 on python3 Jetson Xavier NX. 2020-07-31.
- Jetson Nanoにリモートデスクトップ(VNC)環境を用意する. 2019-11-05.